QR-Code Setup Guide
QR-Code Setup Guide
1. Navigate to the Grow Tab
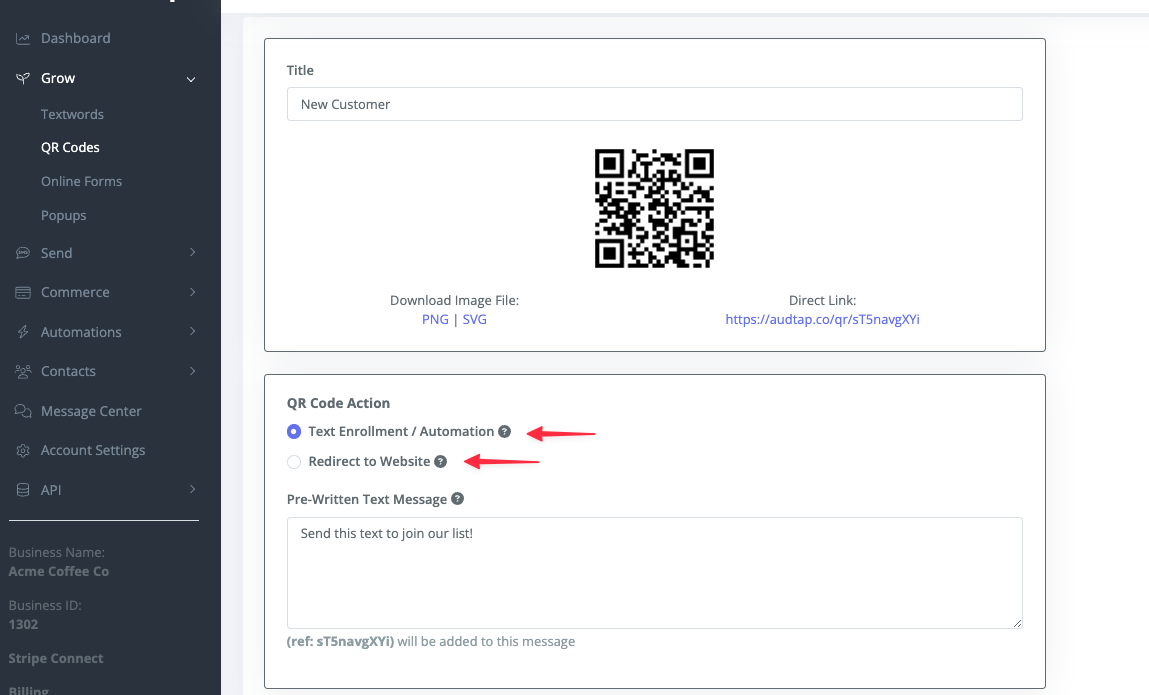
- Select QR Codes - New QR Code - Title it
- You have the ability to use the physical QR for new customers to scan or a direct link. Each action will automatically open the users messages and offer them an action.
2. Decide on QR Code Action
- When the QR Code is scanned or direct link is clicked. Send a custom prewritten text for the user to text you in order to join your list or redirect them to your website.

3. Add Tags
Create a tag to understand where the user came from to later target them. For example, If someone scans a QR-Code at Location A add a Tag and title it "Location A". Launching campaigns in the future you can create a campaign specifically for someone who scanned Location A QR-Code

4. Fill out the required "Send compliance message"
Inform customers about how many times per month or week they will be receiving texts from you. Check off the box to only send message once per subscriber. If the subscriber has already received a compliance message, it will not be sent again when they text this code or scan the QR code.
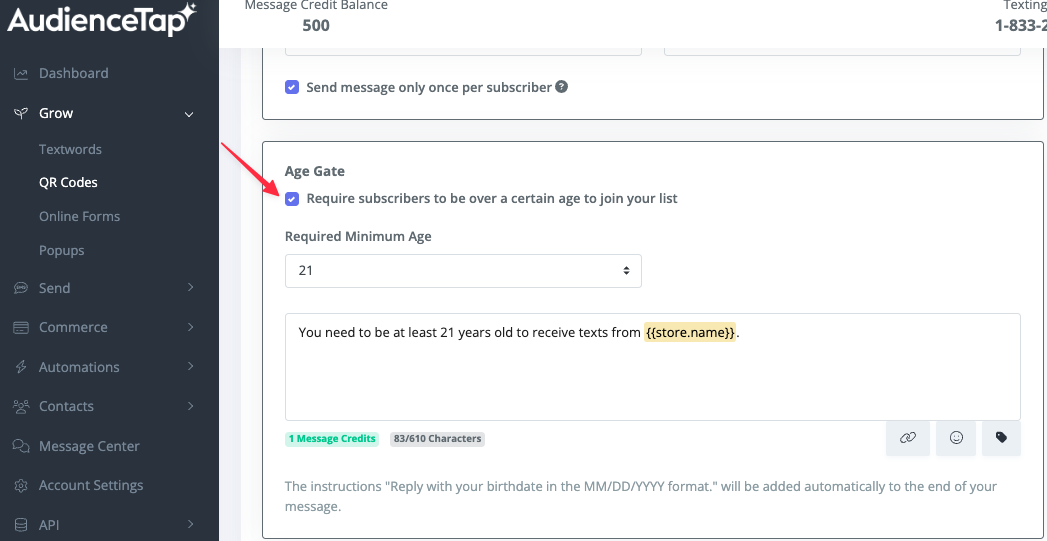
5. Optional Age Gate Verification Section - useful for alcohol brands
Require a minimum age for users to receive your texts. The instructions "Reply with your birthdate in the MM/DD/YYYY format." will be added automatically to the end of your message.

6. Send Auto-Response Text Message when someone scans QR Code
Tailor the pre-written message to include incentives and program details.
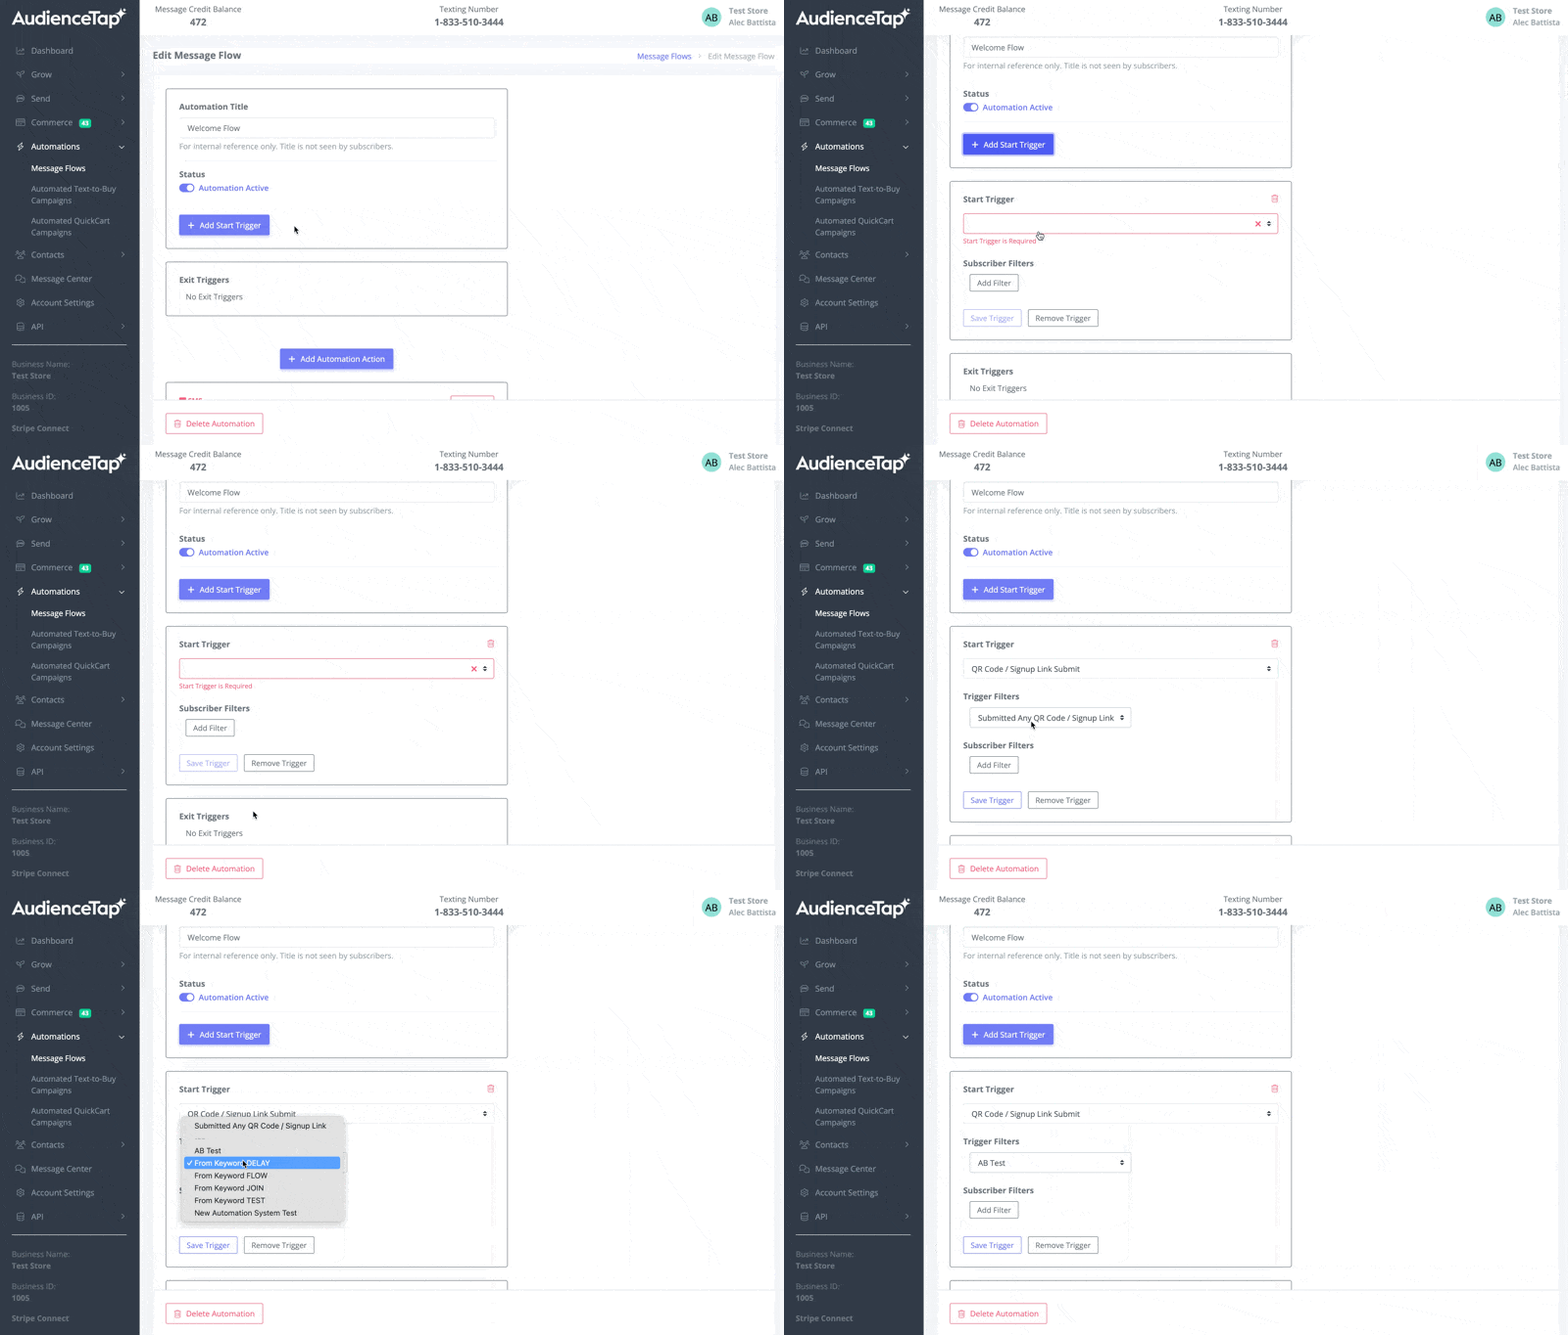
7. Post Enrollment Message Flows
Enroll the new subscriber in message flows, like a Welcome Flow if you've already created this in the Automation > Message flow section. This can be done in the Message Flow Section. In the message flow, add one of your start triggers as the new QR-Code you've just created.

8. Post the QR Code Direct Link inside your marketing emails and on your social media accounts to continue to grow your list.
Didn’t find an answer?
Shoot us a message or give us a call and we’ll help you out


